Elf on the Shelf Calendar and Ideas for 2018 (Free Printable)

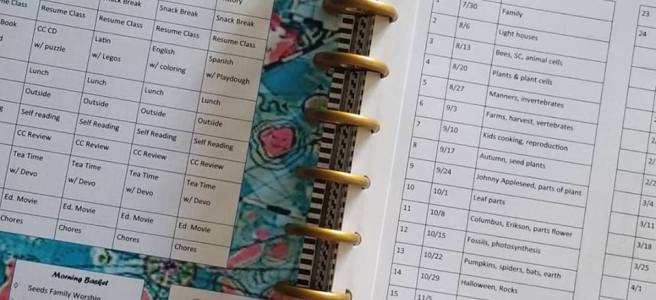
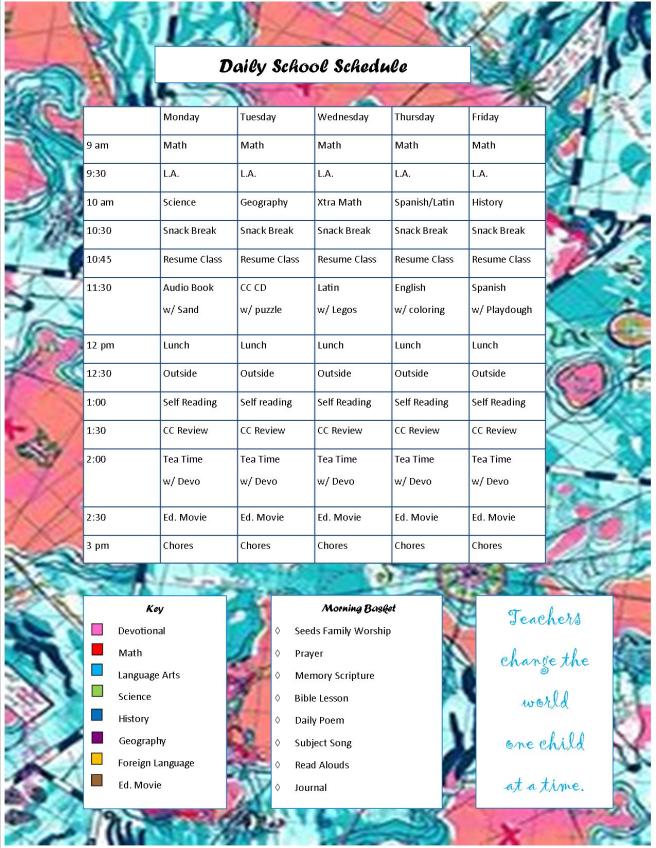
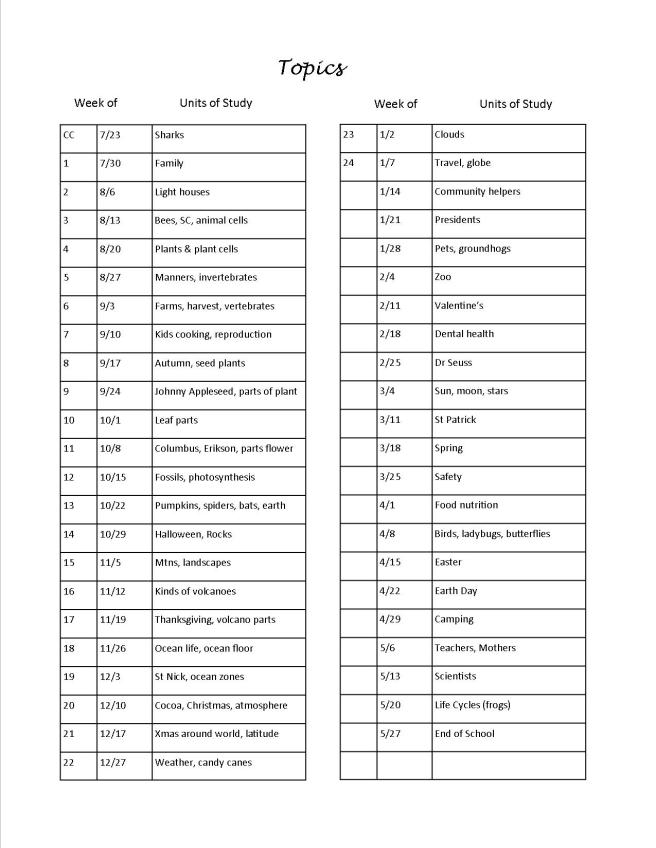
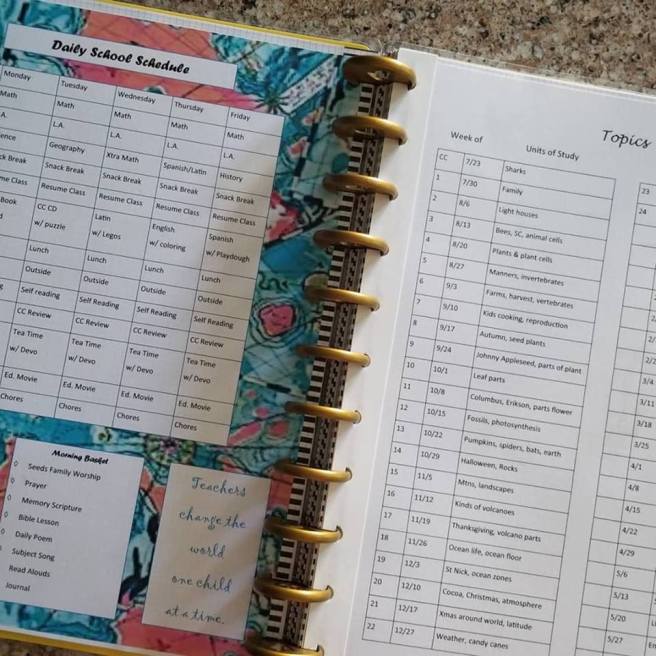
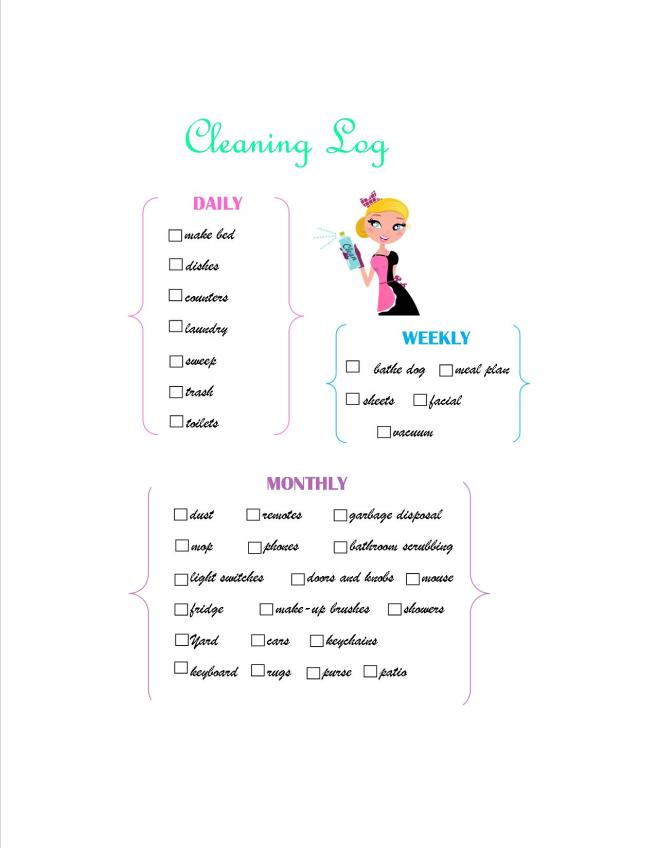
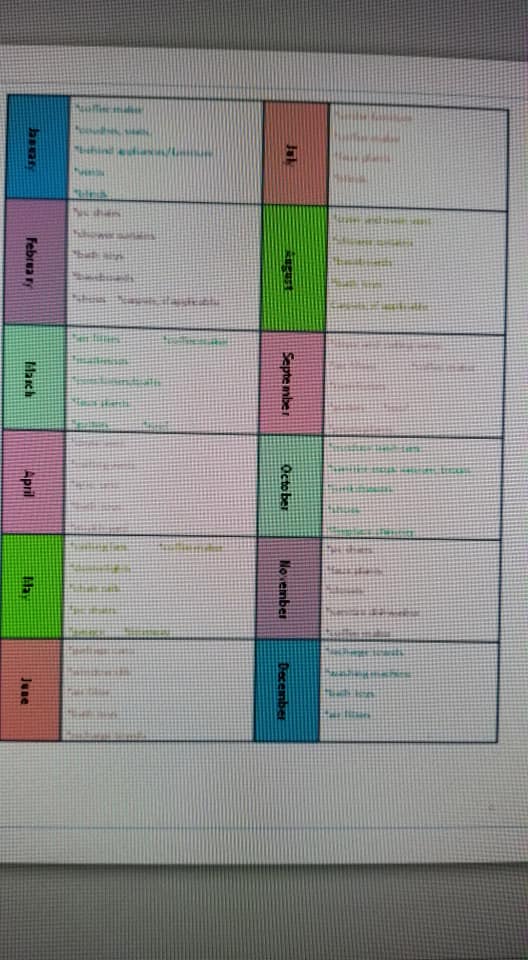
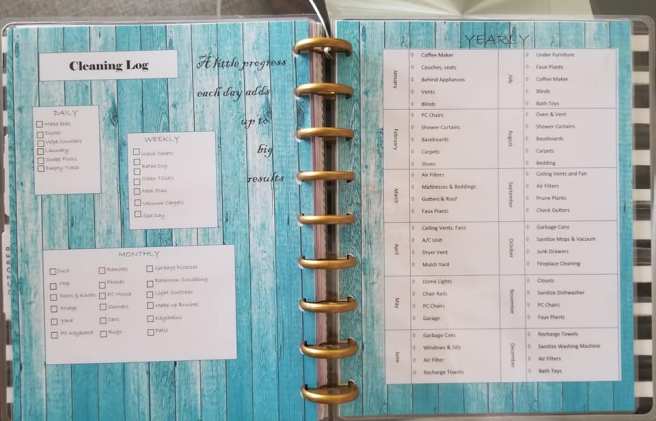
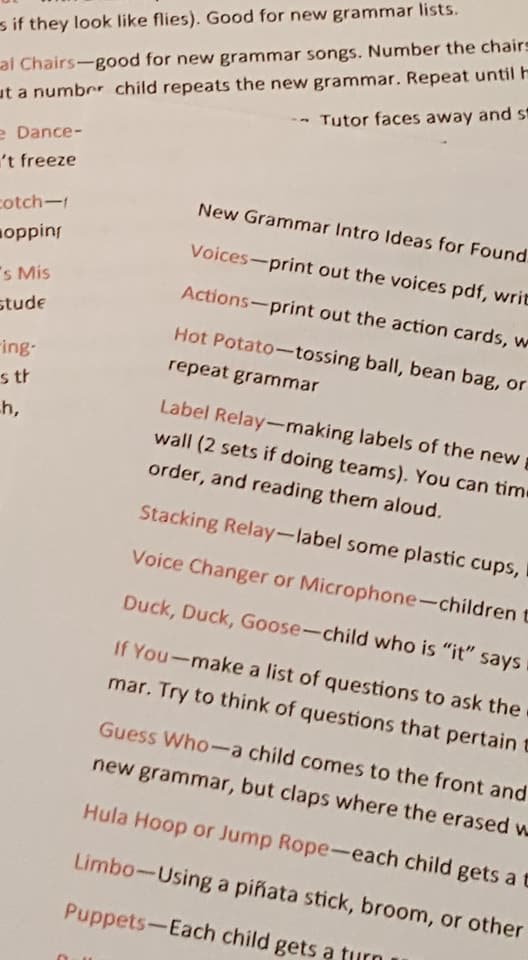
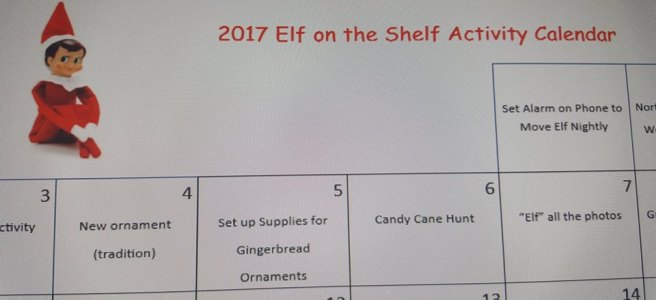
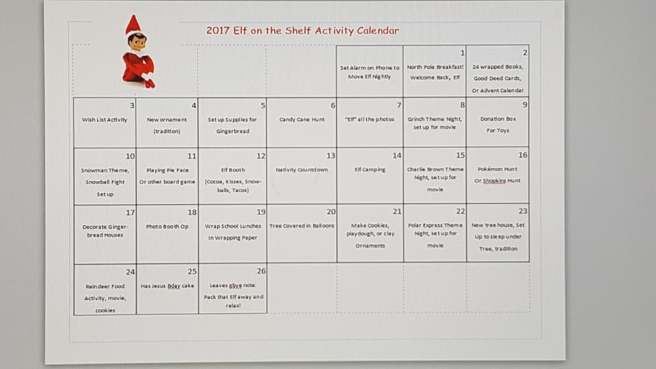
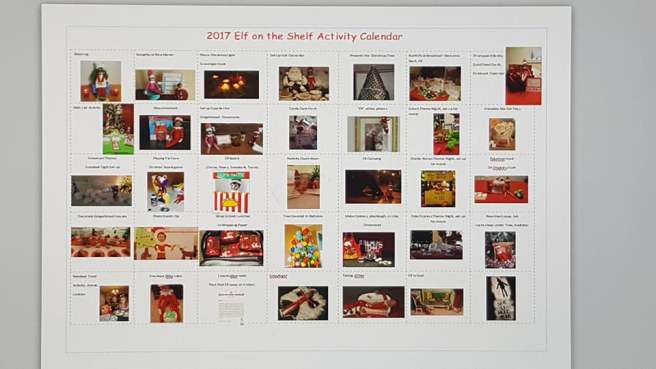
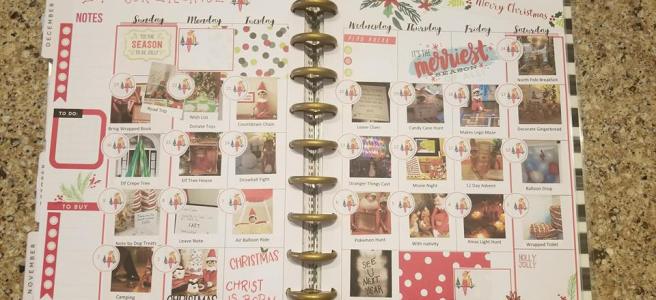
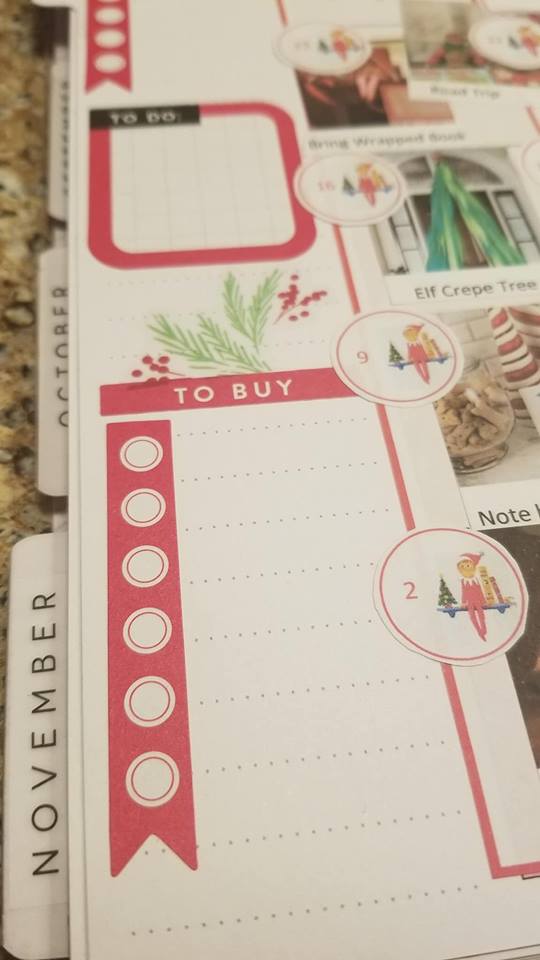
I’ve created many different versions to print out ideas for the Elf on the Shelf over the years, but this year since I’m into planners (especially the Happy Planner), I thought I’d make something to add to that. If you like calendar style, you can just print and cut these, then glue them on your calendar or planner! If you have a planner, it will work just the same way in there. Another way to put them in your planner is to print on label paper (found on Amazon and office supply stores) and cut to size, then just stick in your planner. What I love about this method is that I can put these anywhere I want…I don’t have them dated or put on any certain day or in any certain order, so they can fit your own holiday schedule perfectly!! There are 60 ideas included (plenty to choose from).  I hope you enjoy this printable. Don’t forget to pin on Pinterest. 🙂 You can also use the search bar on this blog to find the ready to print calendars for Elf Ideas.

c5

c4

c1

c2

c3

c6

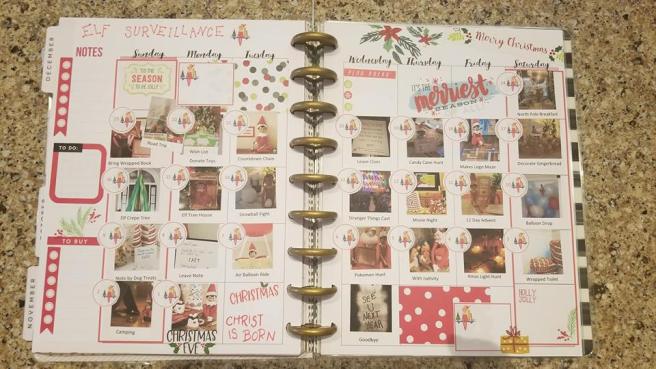
A quick rundown of the ideas in case you’re new to the Elf on the Shelf and might need some more information.

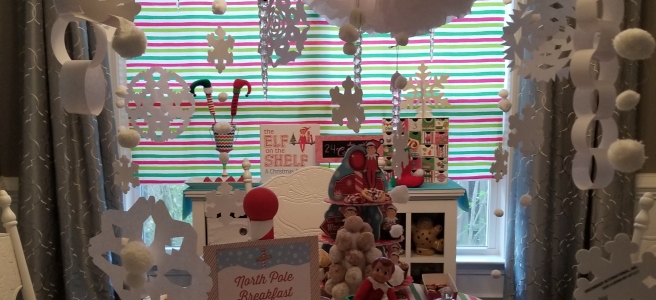
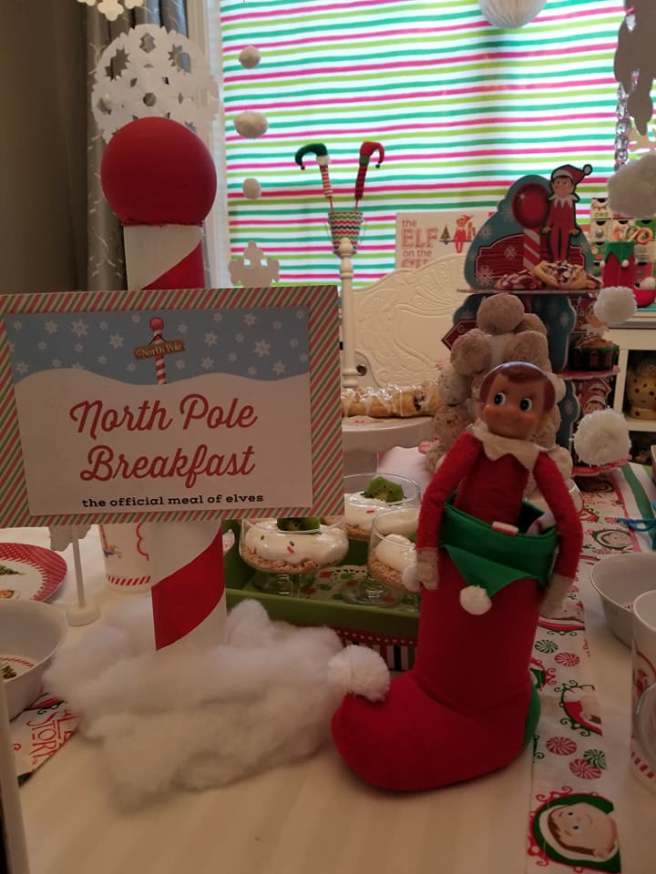
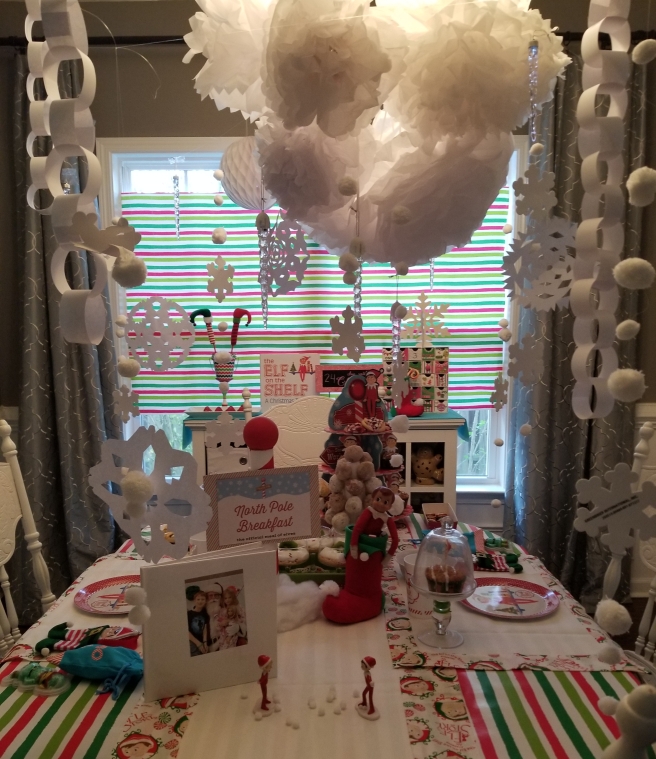
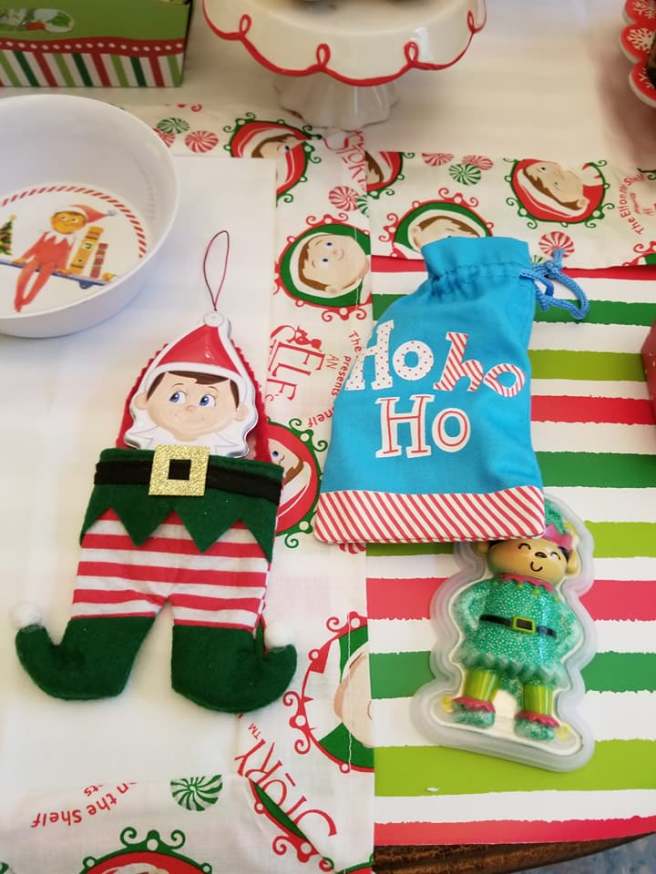
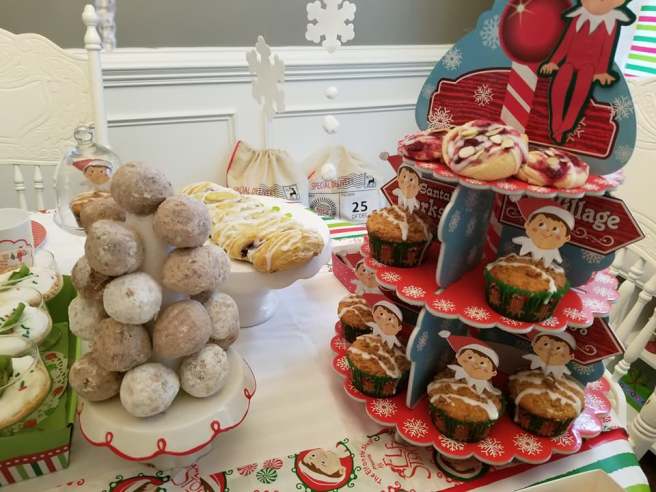
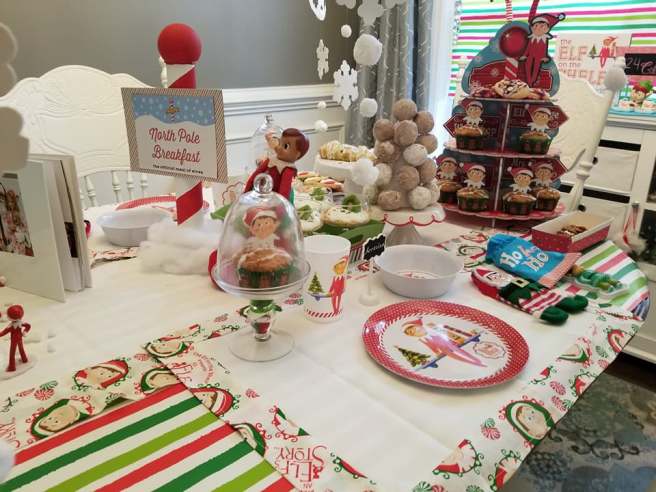
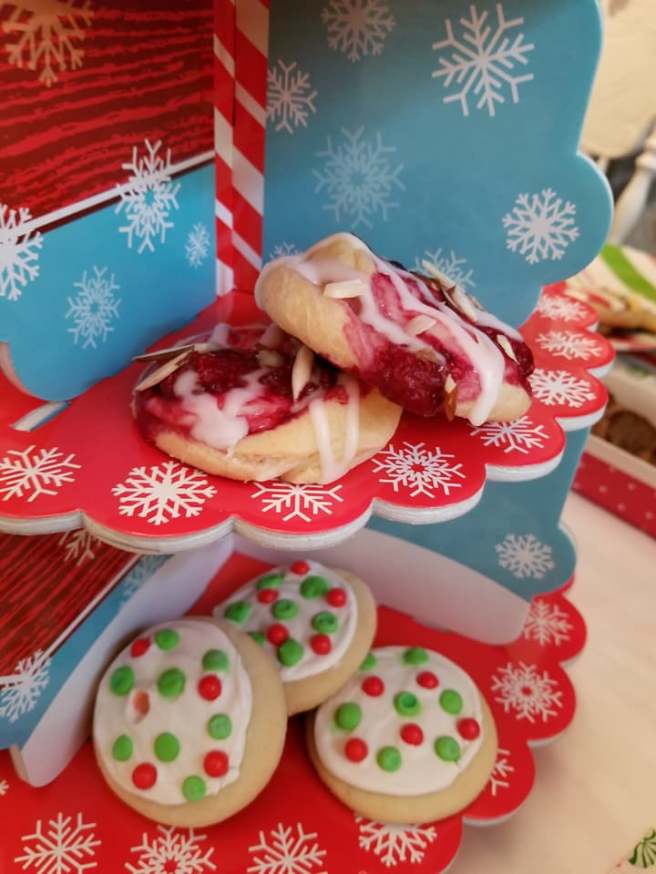
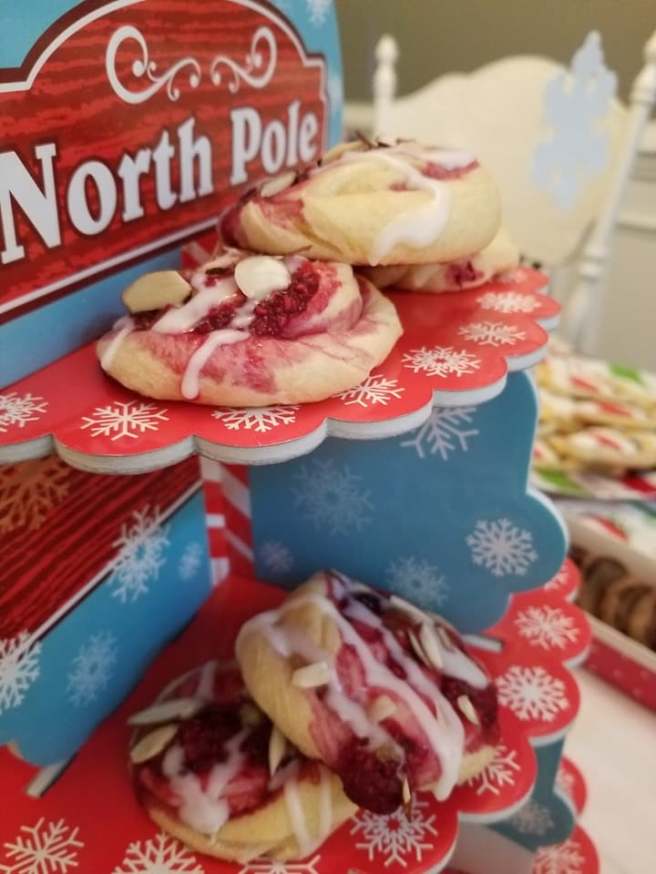
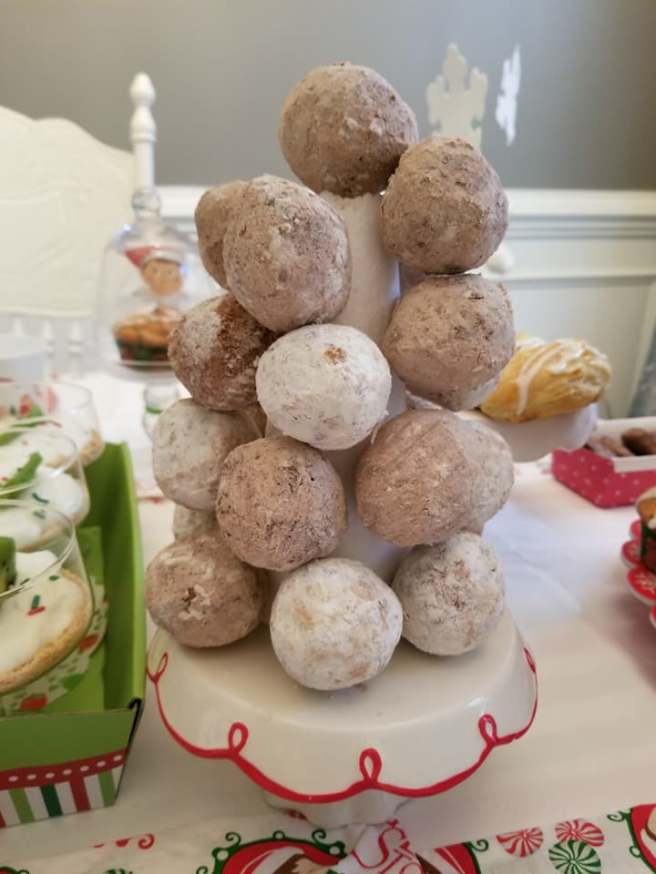
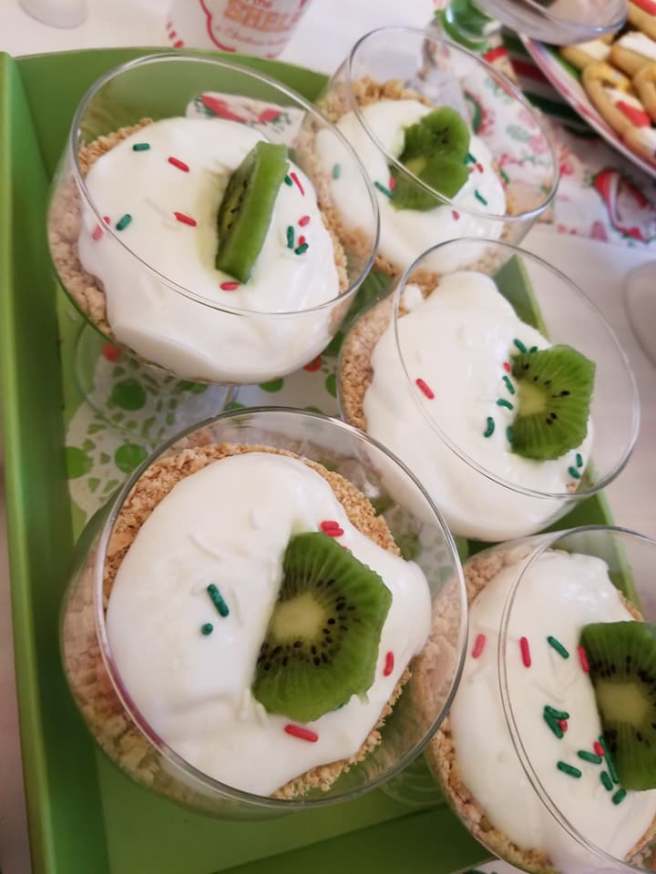
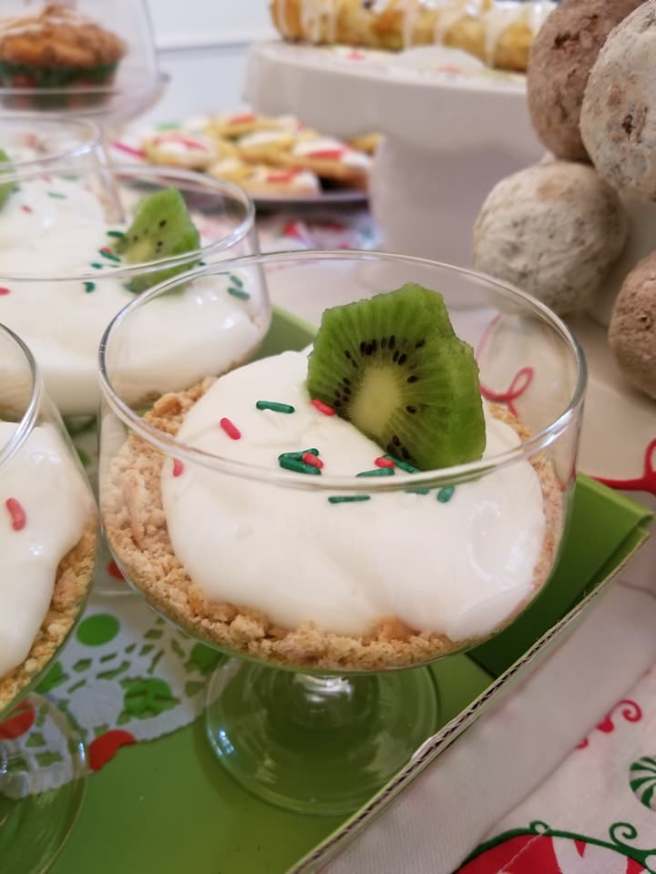
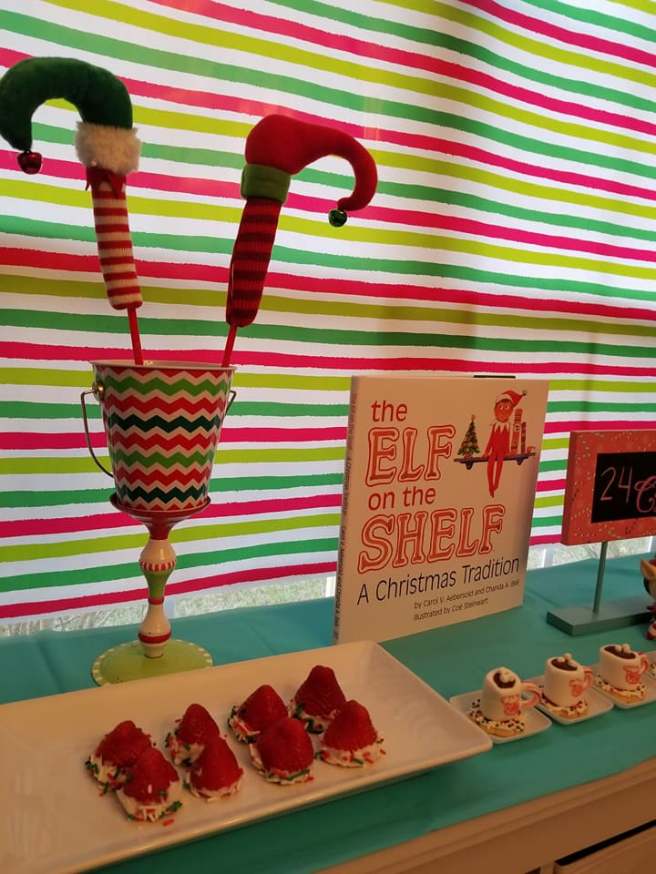
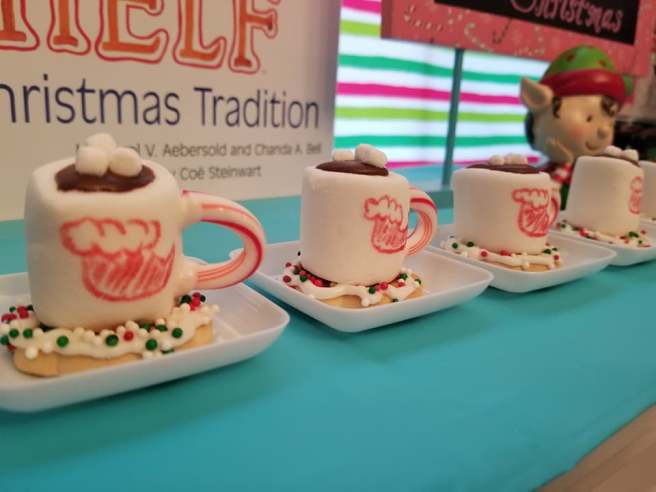
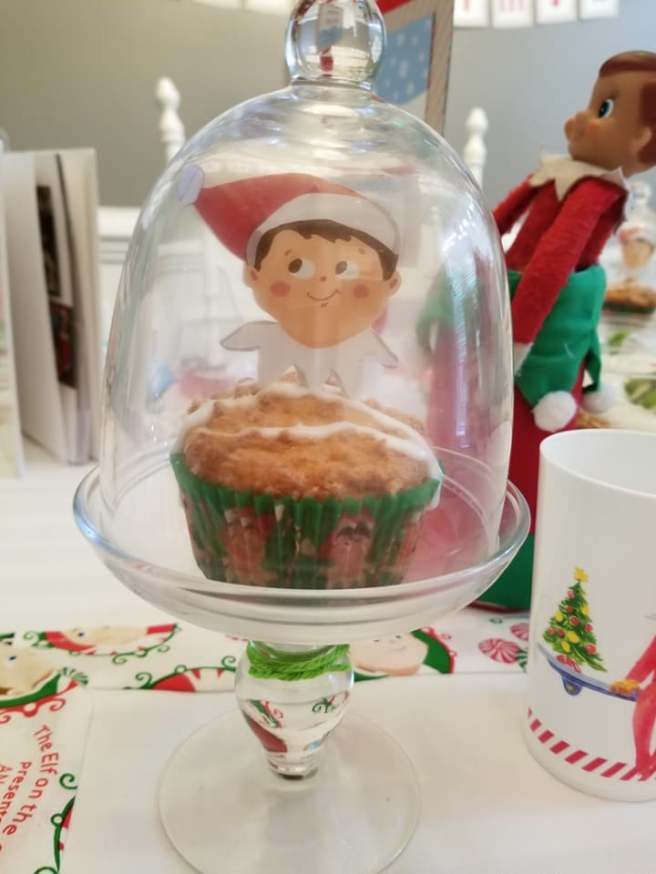
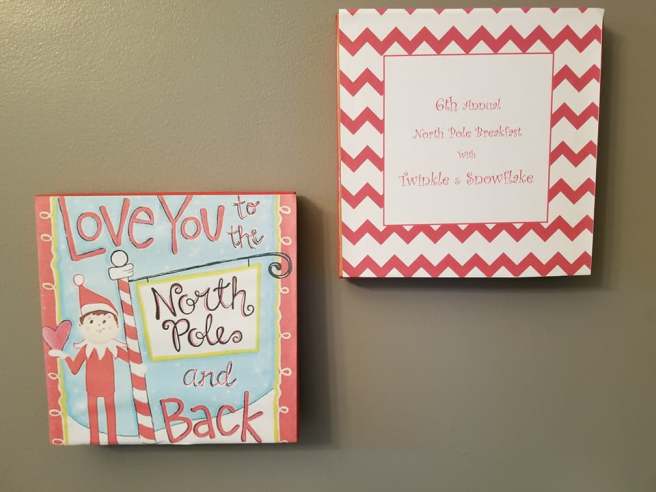
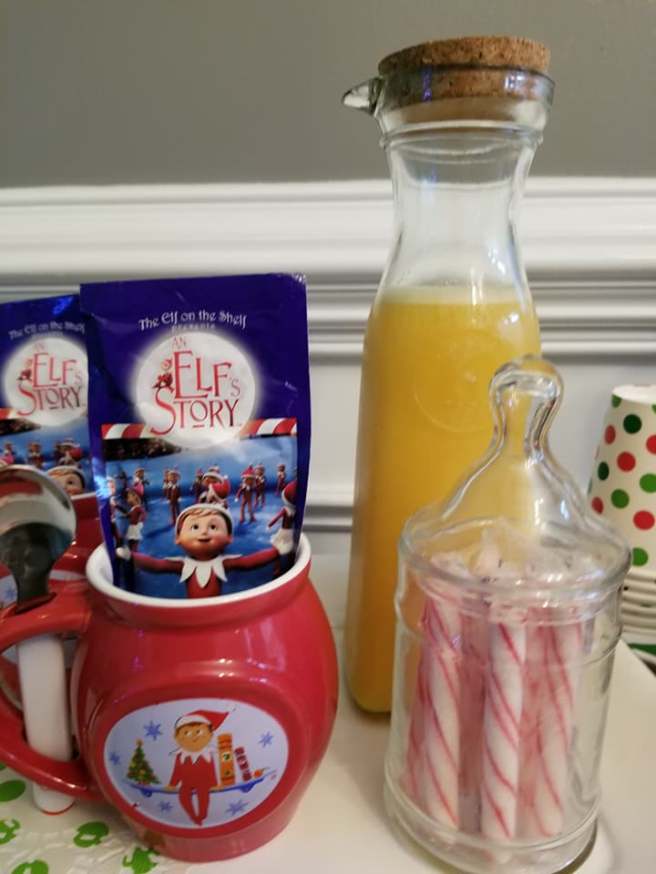
North Pole Breakfast is our family’s way of welcoming our elf back to the family every year. The room is decorated in a new theme every year with a fun breakfast and some new goodies, like pj’s and an ornament for each child. You can do as much or as little as you like, or you can start your own unique tradition of bringing the elf back.

Candy Cane hunt: we use the plastic candy canes that you can get from Dollar Tree (or other stores) and hide them around the house for when the children wake and leave a note with the elf, telling the children to find xx number of candy canes. They love this every year (even at the ripe old age 😉 ). Cheap! Buy real or fake candy canes. If you buy real, you could include neighborhood children, neighbors, or friends.

Trying to bake: the elf just gets out supplies and gets it started to bake something. It could be breakfast, dessert, cookies, or anything! Free with your own supplies.

Building a snowman: you can use anything – marshmallows, toilet paper rolls, legos, etc. Free with your own supplies.

Taking selfies: Or “Elfies” as the elf calls it. Use your phone or tablet to take a photo and set the elf up. Totally Free.

As Minecraft Elves: so many free printables for Minecraft elf masks…just fold and pop onto their head. Practically free!

Growing lollipops: I have a little note I leave for the children (super tiny, like from an elf) with the “supplies” to grow a special treat (candy sprinkles into lollipops). Put the sprinkles into a bowl of sugar and sprinkle with the sprinkles for xx number of days (how long you think they will stay entertained) and one morning place the lollipops in the place of the sprinkles. I like to use our Christmas colored sprinkles, aka “seeds.”  Cheap idea! Needs sprinkles and lollipops.

Polar Express Movie (or ANY other themed movie night): I like to dress the elf up to go along with the movie we’re watching. We’ve done Grinch, snowmen, Polar Express, reindeer, the possibilities are numerous. I try to use what I have on hand, whether it’s yarn to make a costume or felt. You don’t even have to know ho to sew…just use a glue gun. Boom! Cheap – supplies on hand.

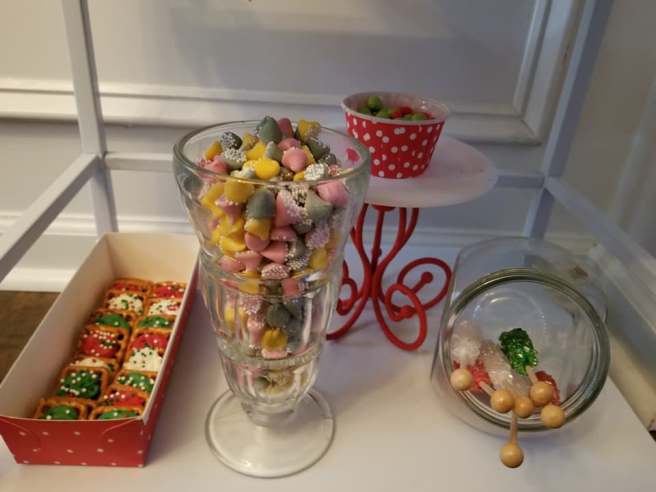
Make ornaments: my daughter loooooves to do this. We make cinnamon ornaments every year and they smell Aah-mazing on the tree. We make quite a few and give them as gifts around the neighborhood or to nursing homes for random acts of kindness. The elf leaves supplies out – glue, cinnamon, cookie cutters. Cheap idea, great memories, thoughtful gift, smells wonderful…this one is a winner. 😉

Draw on photo: take a dry erase or wet erase marker and draw away! Free and cleans right up!

On vacation: if you don’t have supplies, this will take creating. Make a mini magazine, some sunglasses and use some small cloth (felt, tissue, wash cloth, etc) for a towel. You can get more creative with some brown sugar for sand (or real sand if you have some), or other mini accessories. Barbie supplies are the perfect size for an elf (and in a pinch, some American Girl supplies work).

Kissing Booth: there are free printables for this and you can just put it together. Hershey kisses are optional, but what’s a kissing booth without some kisses? Mmmmmm, chocolate!

Make a photo stand: this just requires a trifold board and some paints. Draw any scene on there with something you can cut a hole for the elf’s head and your child’s head. This is a creative way your child can get in on some action with the elf and have a picture taken together. Make a faux “seat” for propping the elf up behind the booth. Low cost, but somewhat time consuming.

Bring donuts: easy! Just bring home donuts…you have to plan this in advance, of course. That’s what the planner (calendar) is for. Don’t forget to have donuts for the elves. You can make them by dipping cheerios in frosting and putting some sprinkles on them or you can use a prop. I had to make them the first couple of years, but when Calico Critters came out with a bakery, you better believe I wanted it for elf props! Hahaha.

Cards to elderly: great opportunity for serving others, as well as spending some qt with your little ones. You can just make simple cards with construction paper, or you can save colored sheets from school work or coloring books to upcycle into cards. Another thing I’ve dine is when I have way too many Christmas cards, I take my least favorite or the older ones and cut off the front or the photo and glue those to create a new card. Low cost to free – priceless serving opportunity. If you don’t make them for a nursing home (or say you do, but you have so many), you can make some for the police department, fire department, emergency personnel, doctor/pediatrician, teachers, ICU, foster homes, shelters, and it goes on.

Making snowflakes: uh, super easy and kinda fun. Just make 1 or 2, leave the supplies for the children to make some when they find it. Free! Well, if you have paper. 😀

Countdown chain: use construction paper and glue to make a mini countdown chain like back when you were a kid. Sign is optional. You can number them or not. My daughter just liked counting them every day. Low cost – glue and construction paper.

Movie Night: set up a movie, grab some popcorn, and the elf is set. You can do this with 1 or multiple elves…or with some Barbies or stuffed animals. Just needs popcorn! Or skip the popcorn and just set up a movie and it’s free.

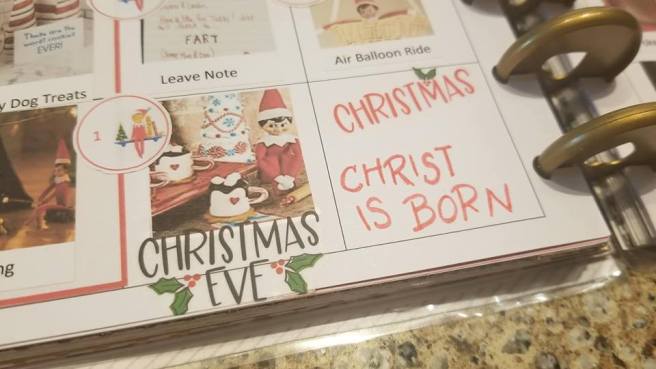
Air balloon ride: I use fishing line to hang our elf from the ceiling when doing setups like this. You can use a balloon or you can use one of the paper lanterns. If you have something lightweight for the elf, like a basket, that’s great, but you can also use a solo cup or something the elf can fit in. Use curling ribbon, yarn, ribbon, rope, anything to tie the basket with and tape the other end up on the balloon or lantern. Hang from ceiling. 🙂

Funny Fruit: you can use googly eyes if you have them, but if you don’t, you can use a food marker and just draw on your food – it doesn’t even have to be fruit. Eggs, milk cartoons, toast…    If you do have googly eyes, you can use tape or glue dots to attach them. Please remember to help your little ones take them off because they are chocking hazards. Low cost to free!

Gifting Elf Poop: Print or make a tab to fold over a baggie of red and green m&ms. Low cost!

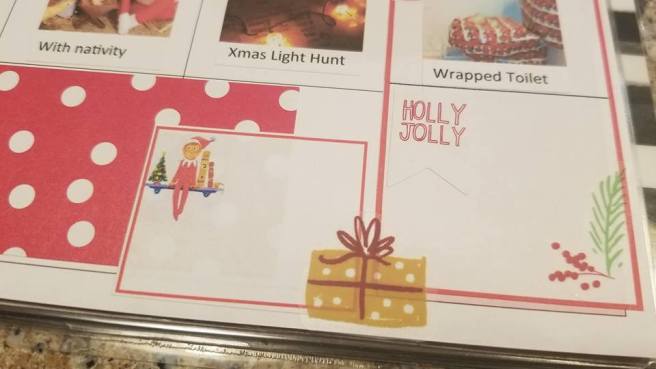
Wrapped Toilet: hahahaha, this will take some time. And will make some noise. Don’t choose a toilet close to the kids’ room or start after you know they are in deep sleep. Just need lots of wrapping paper for this one!

Ugly Sweater: You can find these little sweaters just about everywhere now. They are for wine bottles! Low cost.

Road Trip: I like to make up goodie bags for the children to open along the way on a long road trip. One bag per child per every 2ish hours. If it’s less than that, just 1 bag for the trip. Add in some items you’ve stocked up on ahead of time for the holidays: think stocking stuffer type things. Mine like gum (they’ve been learning to blow bubbles), dry erase games, mini travel games, stickers and pads of paper and crayons, mini spill proof bubbles (makes for an interesting ride), flarp/slime (only suggest this if they are older and you have a travel tray – ask me how I learned, lol), window clings, new dvd or book. Set it all up so the children can see the elves with it and it’s optional to have the elves ready for a trip, too!

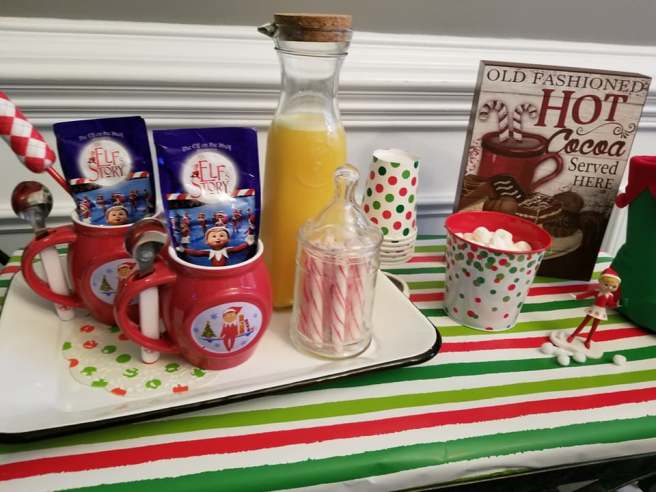
Wish List: This can be something simple or really go all out. I love setting up the “station” where they’ll sit down with a cup of cocoa and write out their Christmas wish list (aka Letter to Santa – we don’t “do” Santa) while Christmas music fills the air.

Light Up Playset: One year we brought their playhouse into the garage so they could keep playing during the winter and I decided to decorate it like a large gingerbread house from the elf. You can use whatever you have on hand – play house or swing set, make a tent with the dining room table, use a pop up tent…anything like that and just put some lights on it and decorations. Free

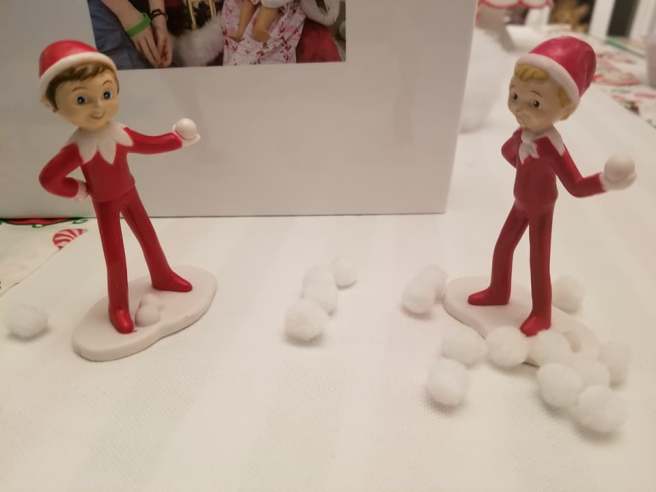
Food Fight: These are marshmallows and powdered sugar, so it’s like a snowball fight basically, but I had to differentiate between this one and the other snowball fight. Free, if you have the marshmallows and sugar.

Mirror Message: Use a wet erase or dry erase marker and leave a fun, holiday message from the elf on the mirror! Free.

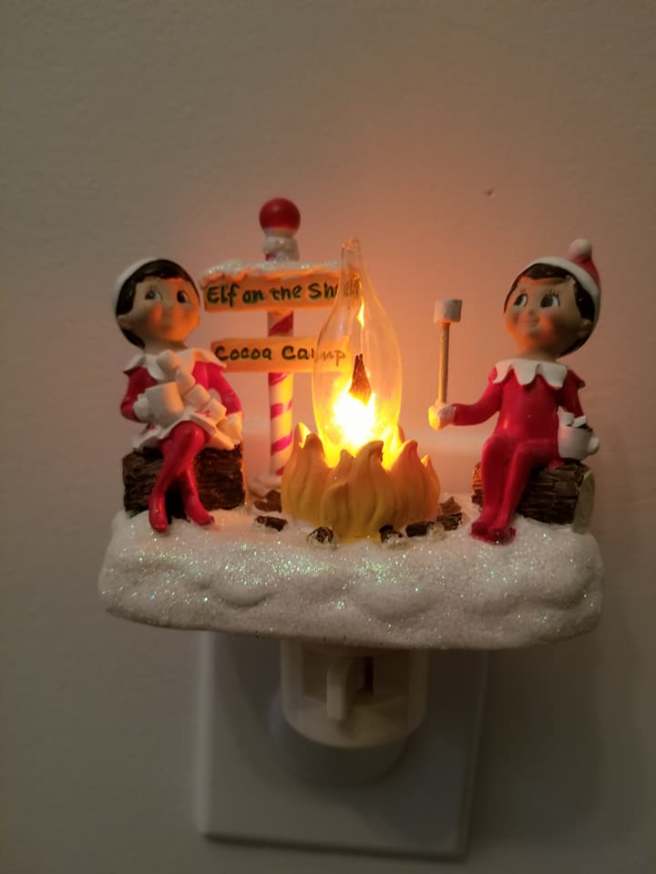
Camping: I just recently ran across a cute makeshift tent setup and wish I had saved the photo, but you can make one with anything or use a doll accessory if you have one. 🙂

Superhero: Use some felt and make a cute super-elf costume ahead of time.

New Door: You can purchase a fairy door (and now there are elf doors being sold) or you can make one. You can also just decorate the whole Barbie house for the elves to move into for the season, which is what I end up doing so I don’t have to buy a door. You can put a construction site area setup there the day before where you’ll be putting the door or house.

Elf School: I printed google images and just taped them to a Barbie house (like a wall background) and used the school accessories from my daughter’s AG. Who knew all this AG stuff would come in so handy? ❤

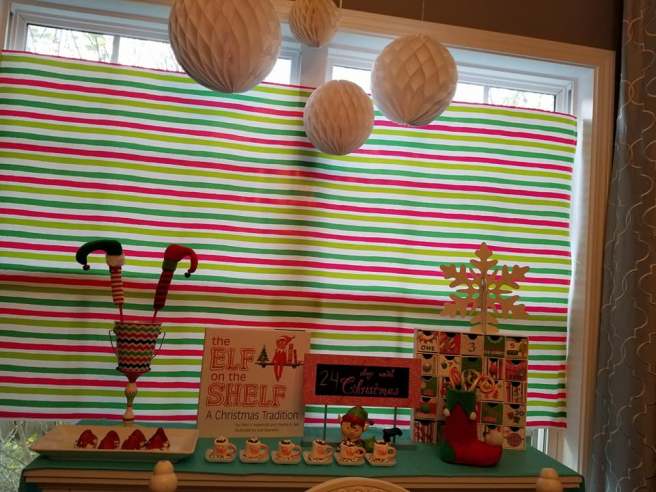
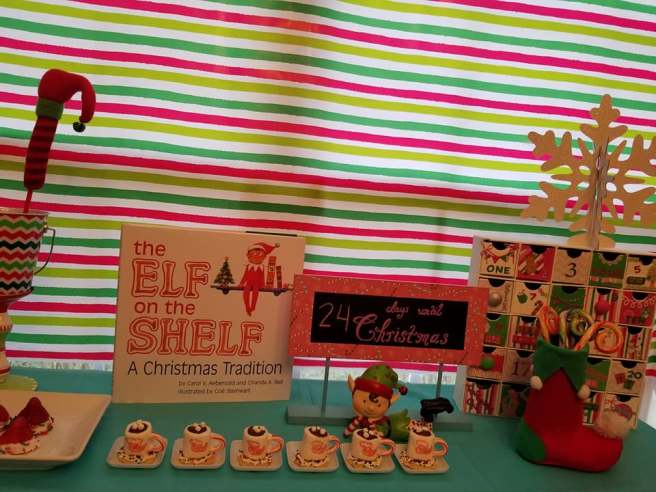
12 Day Advent: This is explained in better detail on one of my previous posts, but basically it’s a countdown to Christmas with 1 character coming out each day with a card explaining his/her purpose in Christ’s birth story. I use a little nativity that I bought off Amazon just for this. It’s cute and my daughter gets to play with it instead of my pretty one. lol. The one pictured here is not it, but you can find it in that previous post or maybe I’ll post a new photo this year!

Christmas Light Hunt: I love, love, love this Christmas light scavenger hunt. We try to do ours the Friday before Christmas. Print out the free scavenger hunt printable (I picked this one from Pinterest) and surprise the children with a fun, memorable night of hot cocoa and light hunting in your neighborhood.

Dressed Up: You can find something you have laying around the house or you can get a cute costume off etsy oooorrr you could just use felt and make something up really quick. That’s how I got my gingerbread ones. 😉 I usually set them up with a movie night and try to match the theme!

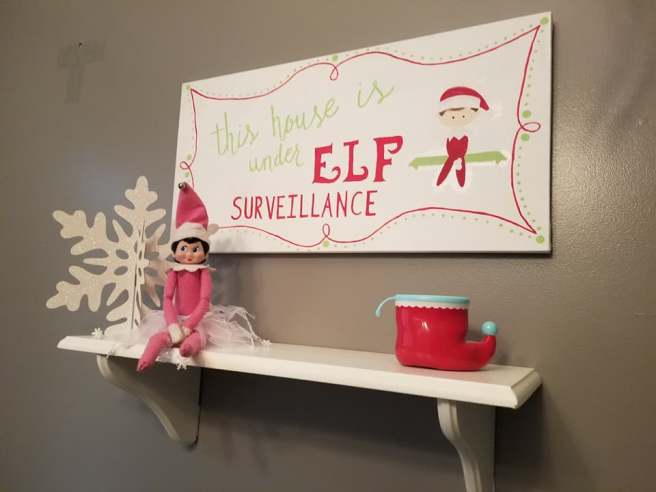
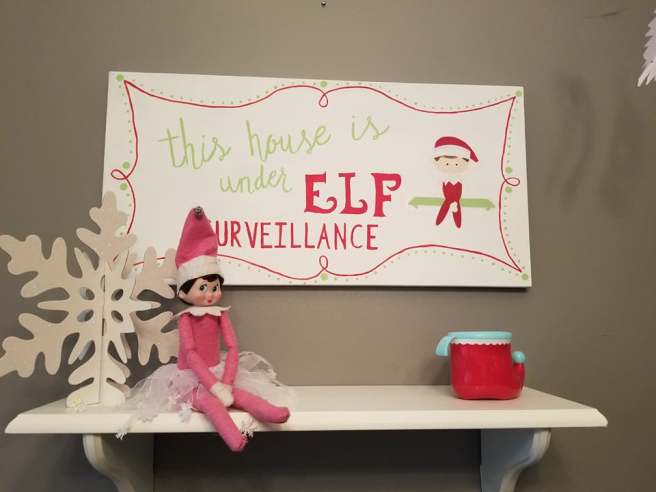
Elf Surveillance: I painted this on canvas I had around with no other plans for. You can use posterboard if you want a more affordable option!

Snowball Fight: We are slowly adding to our snowball collection each year. We are a little obsessed with these cute indoor snowballs. You can get them on Amazon, in Hallmark, Target, Walmart, Michaels…so many places. Or, you can make some with yarn…I did that our very first year, years ago. Make a pom pom snowballs with yard, but start a month or two in advance. It takes a while to get a lot.

Playing a mini game: I printed out a mini version of Candyland and took it a step further and created character pieces for my children and the elf!! I have a previous post on it. Free printable elf games are found on Pinterest.

Pokémon Hunt: I used a pokemon card creator to make an elf card for each child and then I used Google images for the little pokemon that I placed around the house for the children to hunt with their nerf guns and ping pong balls. Free (already had the balls for crafts).

Wrapped Books: We’ve added to our collection for so long that we have 2 books to open per night, so 1 for each child and it’s perfect. If in the beginning you’re like we were and don’t have 24 Christmas books, here’s what I did: go to the library and check out the Christmas books and make sure those are the ones you would open the first week of December, wrap up Christmas dvd’s, wrap Christmas puzzles.

Stranger Things Cast: I have not done this yet, but my son’s favorite thing right now is ST. So, I’m going to try to go with it. I’m going to try to make some costumes like these and use the Barbie and AG props I have. Wish me luck, lol. I’ll post to the blog when I’ve done it.

Leave Clues: my children love hunts, so this will be so fun for them. We actually haven’t done this yet and I’m excited to add something new to our daily shenanigans.

Decorate Gingerbread Houses: We done this every year with our elves. Just set up all your supplies for decorating and set your elf up to enjoy the activity.

Santa Cam: You can make one of these for very little. Use the plastic ornaments you can find in almost any store (including Dollar Tree) and paint your ornament to look like a camera. How fun is that?! If you have some accessories you can add (little frames or such) to add to the authenticity, the better. Low cost!

Donate Toys: You can just write out or print up a cute poem to your child about donating their toys to other children and spreading the kindness to those less fortunate. You can use a bag, a basket, or a box. Free!

Praying: So easy and sweet. Free…praying costs us nothing. ❤

With Nativity: We have a nativity for the children and you can set your elf up with that. We also have a teeny tiny version that we set up in the elf house so they have their own nativity. You can use nativity ornaments or nativity gnome/fairy garden sets. They are small and make such a cute addition to the elf house. Low cost.

Elf wraps and packs lunch: Free…you just need wrapping paper. So, I guess not totally free, but we always have some from the year before. Wrap up everything in their lunch bag and add a cute little note. Let’s aim to show the elves are educated, lol, and spell correctly and keep all the letters forward facing. 🙂

Balloon Drop: If you don’t have the large balloon drop bag, you can use a plastic drop cloth from Dollar Tree or you can use trash bags or streamers taped side to side of the doorway. Low cost – you just need a bag and balloons. Set the elf near by or secure well on the top so he/she doesn’t fall.

Leave Note: You can write up a note telling the children a phrase they can ask Alexa for Christmas. Items needed : Alexa (or similar)

Elf Crepe Tree: You’ll need lots of time for this one! Just create a tree made of green crepe streamers. Very low cost. You can frame it around the coffee table, a chair, the dining table, or just leave it open at the base for the children to play in for a few minutes (cause you know it won’t last long).

Elf Tree House: made with popsicle sticks! So cute. Then, you can decorate it up as much or as little as you like. Low cost – need popsicle sticks.

Note by Dog Treats: Low cost – if you don’t have a dog, borrow some dog treats from a friend or neighbor and leave a little note for the children saying, ” These cookies taste bad. Don’t leave for Santa (or simply, don’t eat).”

Goodbye: Using snow in a can spray, spray a glass door and wipe out the shape of the elf and write See you next year or good bye (or any sweet thing you’d like). Low cost.

Lego Maze: If you have legos, this is great. We actually haven’t done this one yet and I’m excited to do this this year. My children LOVE Legos. It will take time and planning, but they will play with it all season, I’m certain. Low cost (free if you have Legos).

Cookies: Let out supplies to make cookies and make sure you have mini ones for the elves. I saw on Pinterest and idea to have a shrink machine if you want to make one. Decorate an empty rectangle tissue box, cut an opening in each side. Make a ramp and place the regular size cookies on one side and mini cookies on the other side. Cute and low cost.

Cast: Use gauze to wrap around your elf’s foot and make a cast. If you want to make it more realistic (as we will this year), wrap his foot in saran first, and dip the strips of gauze in a flour/water mixture and layer around his foot. When it dries, the children can sign it! You can save it as a keepsake.

Elf Report: All kinds of free printables on Pinterest for different elf reports or you can just make one! Free!

Sick: Easy and cute. If your little one gets sick, this is the perfect time to have your elf be sick. Just tuck him/her in somewhere with some wadded up tissues strewn about and a thermometer. I wouldn’t suggest leaving out medicine with the elf in the children’s reach, as I’ve seen on numerous posts. If the bottle is empty, great…it’s a cool prop. I just am concerned a little one will get ahold of a bottle with medicine still in it and I don’t like to take chances, so we just skip that. Free!!

Elf Meter: You can also make one of these or find a free printable that you like. Also free!

I hope you’ve enjoyed these ideas and have fun setting up your calendar! Check back in the season to see our Elf fun! xoxo

Here is the link for the FREE printable for your calendar:

Printable Elf Ideas


Menu Planning Pages

Hello, hello! I’ve been using a very similar method for my menu planning as the planner page I created, but inside my pantry door on a cute chalkboard I made. I made individual cards and put them in their little clip, which worked great when I was in the kitchen. BUT…not so great when I was at the store. I’ve been loving my HP and loving creating personalized pages that work for me, so making my meal planning page was a no brainer because the method I am using is working almost perfectly.

Now, there may be some menu planners and pages already out there, but I can’t rush off and buy something every time I think of a need. I can, however, take the time to make exactly what will work for me and print it out. Sometimes, I make things again later after trial and error and figure out what works. Hopefully, this works!

Here is my latest meal planning creation:

menu plan

Simple, efficient, and convenient! I can now take this in the store with me (even if my daughter is playing on my phone where my menu is kept, I can happily shop and not forget anything – that’s the plan, anyway).

There are 77 color coded menu cards! Yes, color coded because that’s how I roll, lol.

There is a key to remind you what the color is for. I like that because I can keep my chicken nights from piling up, rofl. My husband is not a big chicken fan. You’ll see I have quite a few recipes for chicken. Aaaand now you know why he’s not a big chicken fan, teeheehee. Another thing having the color coded does for me is that if I do want a main dish back to back (for those nights you cook in bulk or have  leftovers), you can plan that in on purpose, too.

Red – Beef      Blue – Fish     Green – Chicken     Purple – Pork    Orange – Turkey

Black – “other ”    Teal – Soup

I thought about adding an asterisk in the corner for “easy” meals, and an “s” in another corner for sandwiches, but I know my meals, so…I stopped. 😀 Maybe I’ll add it in later.

After I printed the cards, I printed the planner page and laminated it. I used the labels I bought at Dollar Tree. I had to cut them not quite in half (so I could pull the cards in and out) and stick them on the page. I added a sticker on the bottom after laminating so I can change out the sticker (I would like to put fall ones on it next month) and voila!

You can use a WET erase marker to write out your grocery list. It won’t smudge or rub off onto the other papers in the short time it’ll be on your page.

As a bonus, I made my children’s breakfast and lunch pages because I had those inside their designated kitchen cabinet, but another child ripped it, so I decided now was the time to do it all at once. Obviously we aren’t crunchy. #sorrynotsorry #lifeistooshortanyway


Just an fyi, I noticed and fixed the grammatical error on the lunch menu. 🙂 You can print away!

Another option that I have done (before creating the cards) is just to laminate my page (you can still print the planner page) and just use the wet erase to write in my meals. That’s back to writing it in every day/week, so I really like this better. I don’t have to think, I just choose a variety of the colors for the week and add them in based on what we’re doing.

I hope this works as well for you as it does for me or at least gives you an idea of what to try!

cards

You can use the wet erase marker to write in your dates…

cards 1

Here is about the length I cut my labels down to…

cards 3

Here are the labels…for just $1!!

labels

I don’t know how everyone makes their planner pages, but I’ve been printing mine on shipping labels, sticking it to a grid HP classic planner page, trimming, and punching. 🙂

Here are the links for printing – enjoy and have a blessed day!

Weekly Meal Plan Page

Dinner Strips

Kid Menu


Essential Oil Planner Page

Good morning! Today I’m sharing with you all a planner page for your essential oil inventory. I will be using mine to write down and track the oils I have on hand as I collect them. If you have other ideas for what you can do with this printable, I would love to hear it since I am beginning my journey in oils and may not have as many ideas for it.

I have made 3 different pages…please print the page you need! The first page is doTerra, the second page is ALL bottles (for off brand oils or for extra oil pages), and the last page is Young Living.

This printable was made to fit the classic Happy Planner. You can adjust your printer settings to fit your needs if you don’t have the HP.

Hope you enjoy this printable. 🙂

EO Planner Page Classic

EO Planner Page Classic

Homeschool Planner Pages

Today I’m sharing with you my Big Happy Planner pages for the Teacher Edition that I’m using with homeschooling this year. I’m linking a blank one so you can fill in your own personal schedule, looping, materials, etc. I decided to still post what mine looks like in case you’re just beginning and are looking for how a daily schedule *might* look like (it does not necessarily mean it does, but it’s my ideal perfect day lol).

I will try to explain as I go!

We try to keep to a routine so the subject order remains the same, but sometimes we work longer on a particular subject and the things that change are what we do for our looping and tea time (aka morning basket, but I have other plans to begin my morning that include bible study and coffee…not schooling when we get up, haha).

My 10 am time slot is where you’ll see the looping. In case you’re new to this (as I was just last year) this means that we’ll use that time frame to dig in to those studies, usually including reading and games. Something other than worksheets for those.  Since we do each one only one day a week, we take more time in it and take our break between, then resume where we left off. You could do reading before the break and games afterward or vice versa.

11:30 is kinda our quiet time. My children are way too old for naps (wait, no one is really too old for naps – scratch that. My children just don’t take naps anymore. Or sleep at night. They are next level human beings or something. Anyway, to keep things interesting (again, not worksheets all the time) we kinda have a loop schedule for this time frame, too. This is our audio time (yes, that’s quiet around here) and hands-on/calm creativity time.  I’ve bought most of my CD’s on Amazon and have created others from YouTube. We are currently using Hoopla and Audiobooks.

Our tea time is when we implement “morning basket” time. I’ll post soon about what we do in our basket, but if you haven’t heard of it, it’s kind of when we do “one school room” type of work and reading aloud, but they get snacks and we try to do it picnic style! hahaha

Our educational movies line up with our weekly theme in any subject I can find. We use our subscription services for those, such as Amazon Prime tv.

Full disclosure, they don’t always have chores to do, so that’s not a daily thing. I’m a little bit of a perfectionist and am faster than our schedule, in that it’s usually just done before that time frame rolls around. Eventually, I’ll (hopefully) move that. They have certain chores they’re responsible for and I just have them do them together so there aren’t arguments about one getting preferential treatment or it not being fair.

Daily Schedule Big Planner

The key is how I track the school work in the HP. Instead of writing “math” or “writing” or any of the subjects over and over every single day, I just use my pens to make the colored squares ahead of time and just write the pages down, books, games, etc.

Here are our weekly themes.  Feel free to use this to get your own ideas going or to just do the same ones. I tried to line them up with holidays and with our weekly work (based off our Classical Conversations week at home).

Units of Study

in the planner 1

I also learned a nice tip as I used my punch for the first time ever on my Big HP. I’ve only had the classic for a month, so a couple of weeks ago I got the punch. I couldn’t understand why they just didn’t make it for the large size and you put your classic pages in it, too. Anyway, back on track…I messed up and had huuuge holes because it wasn’t lined up properly and I didn’t want to waste my page. I thought, well, I need to reinforce the page now and still make holes. Solution: I got out my white cardstock, cut two strips down the length of it, glued (glue stick) one strip to the back side of the page along the messed up holes, and glued the other strip on the front. Let it dry for a few minutes and punch the holes. It turned out PERFECT!! You can see it in that photo above. It will hold way better and longer than just reinforcing with washi tape or reinforcement tabs. You can use scrapbook paper, too, and match it with your theme to look nice.

Below is a blank loop schedule for you. You can fill in your material (books) in the curriculum boxes and the subject looping is where I put down the “fun” books, games, and cards we use.

pic of loop

The resources page is where I list our material books at a glance, all our games, cards, fun type of learning tools (all color coded to match the subject we’d need them for), magazines we check out at the library, apps on the tablet, and websites for the pc.

in planner 3

in planner 2

I hope this helps your school year and is a blessing. Here are the links for printing pages for your BIG HP.

Blank Daily Schedule Big Planner

Blank Material and Looping Planner Page

Units of Study

Blank Resources Planner Page

Fall Bucket List Printable

“But I think I love fall most of all”…I really don’t (I love summer most of all), but I do like fall 2nd best. Every year I make a printable and usually laminate it to cross off with dry erase. This year since I am loving my planner, I made one for my planner and would like to share it with you all. It fits the size for the classic Happy Planner, but I started in a 3 ring planner and it should fit there, as well. If not, I think I’ve read that you can just adjust the printing size to fit your needs.

I started with a cover, but I just used a google image, printed, and laminated, so I don’t have that saved to share. You can find so many cute images online.

fall cover

Next I created the bucket list that fits our needs for this year based on our interests and the age of my children now. I believe I have versions for younger aged children in a previous post if you search with the search button. Some things included in that list are making a sensory bucket, making fall playdough, etc. My children are too old for that now. 😦 Here is this year’s list:

fall bucket list

The final printed version will be slightly different in that I decided after printing it I wanted a little more in that bare spot on the lower right hand side, so I added the leaves there. Here is the link:

Fall Bucket List

Please enjoy these free printables and enjoy fall!!

American Girl Tea Party

My daughter got an American Doll for her birthday last year and asked if she could have her very own birthday party with gifts for her. I had been dreaming of a tea party for a couple of years, so I thought we could combine them. This year, I finally made it happen!

tea 1

tea 4

tea 6

tea 2

The decor was what I had around the house (or rather, my attic mostly). I was tempted to use paper plates and disposable everything since it would be for some young ladies, but I wanted a “real” tea party.

tea 5


The tea pot banner I made by cutting out the different shapes out of scrapbook paper to make a teapot. I used the same concept to make place cards! I didn’t have a template, but I’m certain there are some online somewhere. I used a glue gun to put it together.

tea 26

tea 3

Girls brought their AG dolls ready for the tea party. I gave them each had a hat…soooo cute!

tea 7

Some of the tea party food included raspberry scones, cucumber tea sandwiches, mini crepes, and pinwheels. Of course we had tea to drink and pink lemonade to keep with the pretty theme.


Sandwiches: https://www.thespruce.com/tea-sandwiches-for-kids-parties-2104447?utm_source=pinterest&utm_medium=social&utm_campaign=shareurlbuttons

One of my favorite treats were the vanilla bean tea cakes…oh em gee…just melt in your mouth. Best new thing I made. Made with real vanilla beans and just the right amount of sweetness. Not just for tea parties. 😉

tea 14

Here is a link to the MUST HAVE recipe

https://cookiesandcups.com/southern-tea-cakes/

The mini me’s sat at their own tea table before the girls sat down. We played an ice breaker game by letting them all introduce themselves and the doll they brought and a little about themselves.

tea 20

tea 21

The little ladies selected their hors d’oeuvres and a friend helped to fill the tea cups.  Before the snacking began, we had a special surprise – an instructor for tea time etiquette gave a short lesson on properly handling a tea cup, how to sip, use a napkin, and all things pertaining to tea time at the table. It was so fun!

tea 15

tea 16

They did so well and seemed really interested in learning and participating.

Finally they were able to begin snacking and socializing – what every little lady is eager for. 🙂 And sometimes us Moms, too!

tea 17

tea 18

tea 19

Next we moved to the breakfast nook to begin crafting. I thought it would be fun to paint mini tea cups. I thought it would make a perfect party favor coordinating with the theme and their American Girl would have their own tea cup for their tea parties at home. ❤

tea 23

tea 24

tea 25

And last, but not least, they played with their American Girls as they awaited to be picked up. This was certainly a fun, memorable, and unique party that I am so thankful we did while my daughter was the perfect age for it.

tea 22


“Cleaning” Planner Pages

Hello, all! I have been MIA for a while with so many changes going on in my home life. More will be coming up, but in the meantime, I am going to try posting my recent hobby: planners and all things related. 😀

I’m going to start with where I started on my printables…my cleaning log!

I hope you like cleaning because that’s the first printable for a planner that I’m sharing, lol. If you don’t, hopefully having an organized plan for it will help make it more bearable. Personally, I love cleaning, most of the time. I’m weird like that. 🙂 Here is what you’ll be getting:

Cleaning Log

cleaning 2


Sorry that they are blurry! I took the pic before even printing. 🙂 Here’s the link if you’d like that one   Cleaning Log

Here is a second one I made. I laminated it and use a WET ERASE marker (because it won’t smudge) to check them off as I go to know what’s been done.

cleaning 3

Here is the link for the blue plank cleaning list:

Cleaning Log 2

Feel free to print and use either one! I get my images from Google, as mentioned in previous posts. These are not my original images, but I created the document and share it freely for all to enjoy.

I will be posting more planner pages soon! Thanks for visiting!


North Pole Breakfast with Elf on the Shelf ~ 6th Annual: Elf Theme!

Well, it’s December 1st again! Families with elves, you know what that means… our scout elves have returned from the North Pole to kick off the start of our advent.  This year’s theme is Elf. 💗

NPB Table 2


I started with the grand entry from an idea I saw on Pinterest with plastic tablecloths. I cut them into strips and hung them from the  ceiling.

entry

My inspiration for decorating in the elf theme came from the movie Elf and decorating for a movie night with family last year.  I liked the white snowflakes and paper chains because it was festive, affordable, and easy, plus, one of my favorite scenes in the movie is when Santa comes to the mall!

20171201_090524

I used the “Santa’s coming. I know him!” banner printable from that I had printed last year (found on Pinterest).

Banner

I used a colorful striped wrapping paper across the table and the back window for a pop of color. Also affordable, easy to decorate with, and easy to clean up afterward.

Advent Table

I sewed an elf table runner and place mats with material I bought online at Joanns.  I love that we can reuse them all season and every year. This is my first ever DIY set (last years’ didn’t count caused I used a glue gun, bahahaha). Not too bad! It was a pretty easy project and fast. 🙂

Runner

My sister, who knows I love EotS, gifted me with the tableware set last year.

Dishes 1

Dishes 2

I just love all of the elf accessories and decorations I was able to find at Hobby Lobby.

Trinkets 2

Trinkets 1

For breakfast, I made cinnamon streusel muffins, a cinnamon and white powder donut hole tree, a blueberry braid Danish, raspberry Danishes with an almond glaze and slivered almonds (these were amazing), chocolate pretzels, miniture faux Cocoa mugs from marshmallows and candy canes,  white chocolate dipped strawberries with sprinkles, turkey sausage,  vanilla yogurt parfaits with a graham cracker crust topped with kiwi slices, and of course, elf sugar cookies.

NPB Table 3

NPB Table 1

24177200_10160195680955131_2796430394153353222_n

Blueberry Danish Braid

Raspberry Danish

Donut Tree

Parfait 1

Parfait 2

Strawberries

marshmallow cocoa mugs

muffin stand 1

Elf Cookies

Elf Pick

I just love the elf glass food pick that I found at Hobby Lobby. It came with 3 other picks, but they didn’t match the theme and didn’t have a food that needed them. They’ll come in handy later, though!

The elf stocking “stands” are from Walmart. I actually got them last year after Christmas in preparation for this breakfast!

Advent Table 4

I used a canvas I already had and painted the elf surveillance picture for us to use all season.

Elf canvas

Elf canvas 2

I printed off an image and taped it to a cardboard canvas, as well as made a sign for our annual breakfast.

mini canvas

Our elf picture is from, you guessed it-Hobby Lobby!

candy 2

Of course I had to decorate with candy, candy canes, candy corns, and syrup. I was so excited to find Christmas colored candy corn at Tuesday Morning. The miniatures syrup bottles were from Cracker Barrel… I love miniature accessories. We have only had rock candy once, so I thought it would be a special treat to have the Christmas colored rock candy as part of an elf food group.

candy 1

candy 3


This adorable night light was found on Amazon, as well as the miniature elves having a snowball fight. I tossed in some small pompoms to look like more snowballs.

nightlight

24058842_10160197707060131_8904348810215355983_n

Our North Pole breakfasts always include hot cocoa. We usually end up saving it for our movie night, which is the Elf movie tonight. There were marshmallows, peppermint sticks, and regular or peppermint hot cocoa to choose from. They also have the choice of oj or water instead. 🙂

Hot Cocoa 1

Elf mini girl

Hot Cocoa 2

Hot Cocoa 3

This year, I invited our neighbors to have breakfast with us and celebrate, so I had some elf treat boxes.

Treat Box

The advent calendar is the I made years ago, with the directions on a previous blog post. It’s holding up pretty well! I want to make more for gifts. 💓

Advent Table 3

Elf trinket

Every year, the children get pajamas for the season. This year, I decided in addition to new pajamas I would make them elf pillow cases. They’re in the North Pole boxes. 🙂  Now to learn to make fitted sheets. ☺

Boxes

Elf Pillowcase

One gift I think is really special (and I hope the children agree) is the book from Shutterfly with the past 5 years or of our elf antics and random acts of kindness. I will leave it out all season for the children to enjoy.

24174624_10160197710225131_8190991399519167191_n

24174430_10160197707155131_7025053035101257594_n


I hope this Elf theme North Pole Breakfast has inspired you! Thanks for visiting my page; don’t forget to save to Pinterest. 🙂  Happy Elfing!


New Grammar Intro Ideas- Updated

Hello! If you’re looking for an easy, fall back list of ideas of introducing your students/children to new grammar, here it is!

I have kept my ideas that worked from my original list on here and have added a few new ones that I learned this past year.

The free printable is at the bottom of this page. Have fun!

22489760_10159989264700131_1031246912776626539_n

After printing the simple list, I taped it on the inside of my weekly community planner:

22528302_10159989264800131_2003904684821518909_n

New Grammar Intro Ideas


2017 Elf on the Shelf Calendar and Activities – 100 Ideas!

Hello, all! I am indoors, trying to stay occupied while the wind whistles in the air and rain pounds on the roof…just thankful the electricity is still on here. I am so ready to plan for our elves! How about you?

I have been working on the calendar for a week, I painted an elf canvas the other day (can’t wait for reveal), and made some really cute elf crafts.

Sharing this year’s calendar with you and some ways you can use it!

  1. Print out page 1 and follow along or mark them out after you’ve done them
  2. Print out pages 2-4 and laminate, mark them off after you’ve done them
  3. Print out pages 2-4 and cut them, glue or tape them on a current calendar, in any order that works for you
  4. Don’t print anything and just write down the ones you like on your calendar 😀

Here is just a sample of the calendar:

calendar 1

calendar 2

There are 100 ideas!! So don’t feel overwhelmed; I just wanted to have a lot of options for easy days, activities, fun, or some that take prep. Plus, you can use this for a few years because the ones with pics aren’t in a 2017 calendar.

Some of these you may have already done, but I’ve included a lot of new ones for this year, as well. I can’t wait to get started!

Some other options to look into are the Shepherd in the Search and Kindness Elves. Similar concept, but with a more Christ centered approach. I like to keep our ideas clean and family friendly.

So if you’d like the calendar, here is the link (don’t worry, the dotted lines don’t print):

2017 Elf on the Shelf Calendar